

Why is it that designers can’t do without DIALux Evo?
“We focus on usability, performance and functionality. The upcoming DIALux evo 8.0 will focus on usability…” — Thorsten Kock, DIALux Software Development Business Unit Manager
Let us summarize the highlights of DIALux evo 8.0
работни обувки fw34 steelite lusum s1p 38
normamascellani.it
covorase man
bayern münchen spieler
karl sneakers
addobbi fai da te matrimonio
prestonstadler.com
spoločenské šaty pre moletky
fingateau.com
lifeonthevineministries.com
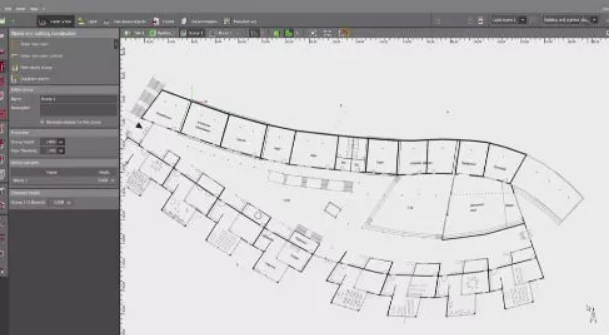
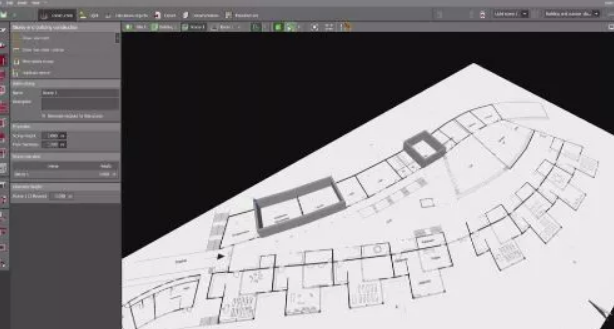
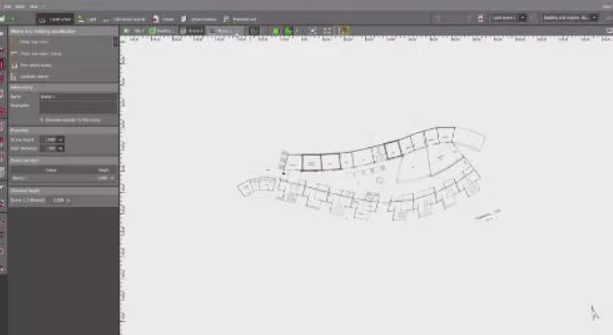
1 Direct design of interior space
The interior space can now be defined directly through the internal contours, DIALux evo automatically generates walls, and the designer does not need to draw additional contours.
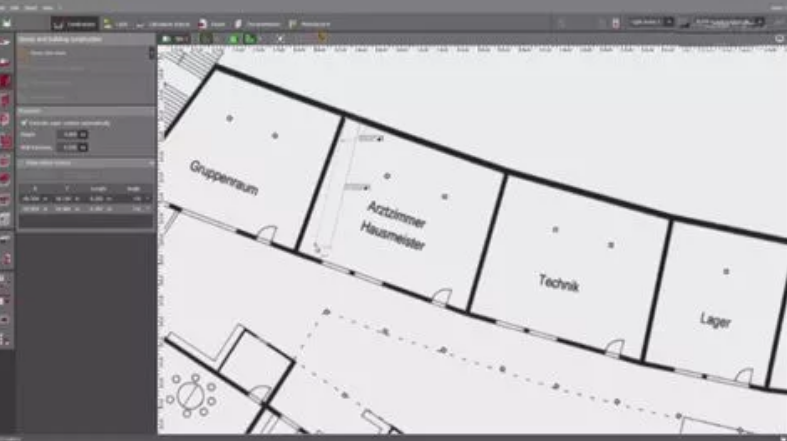

In addition to saving time, it also improved the workflow of those who wish to quickly evaluate the evaluation of each room.
Design with pictures
Still worrying about no DWG drawings? This time DIALux Evo 8 adds images as a basic design feature. You can import * .jpg, * .bmp and * .png files and display them in real proportions of the design.
2Design with pictures
Still worrying about no DWG drawings? This time DIALux Evo 8 adds images as a basic design feature. You can import * .jpg, * .bmp and * .png files and display them in real proportions of the design.
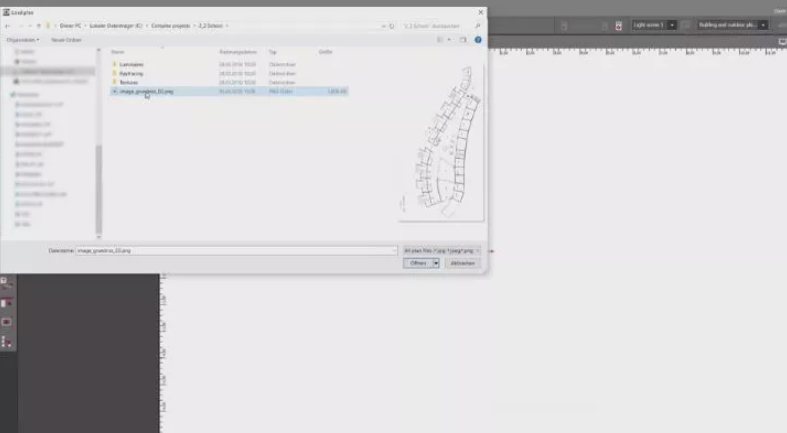
Importing PNG, JPG or DWG is equally applicable indoors and outdoors, and the import method is the same, only a few steps are required. The first step is to define the X-axis. The next step is to define the length so that the scale is set correctly. Therefore, it is highly recommended that you use the scales in the design, or longer distances, to define the scale more precisely than short distances.
JPG has a background that can be moved like DWG, you can import several, even combine them. Another feature unique to JPG is the choice to make it transparent or opaque, which can be useful in complex design situations.
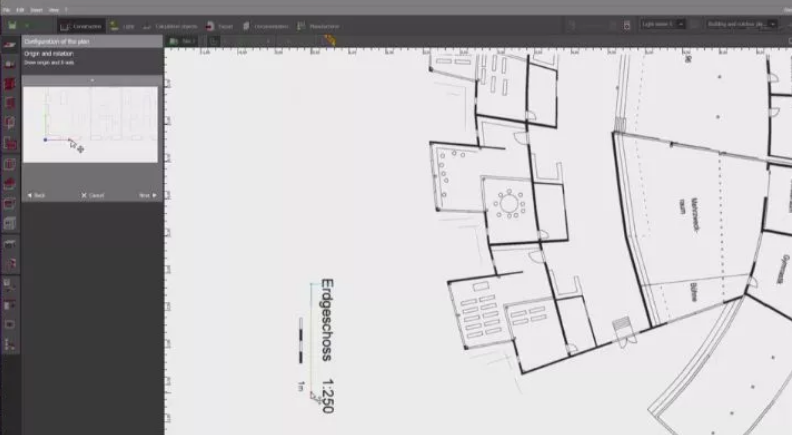
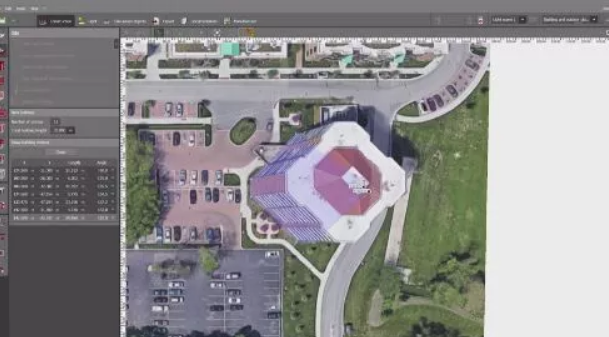
In addition, you can use the crop tool to easily import image crops from pdf or Baidu maps.
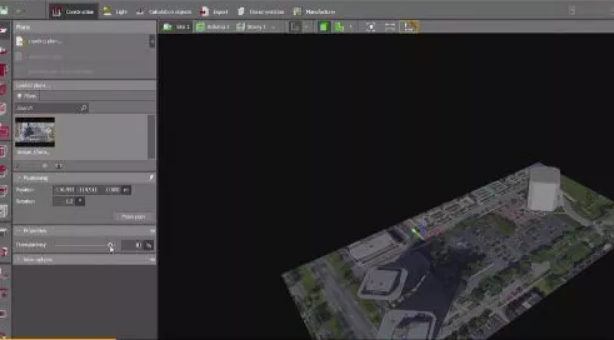
Example: Now try this outdoor design, a picture from Google Maps, and then the previous steps, starting with this 11-story building:
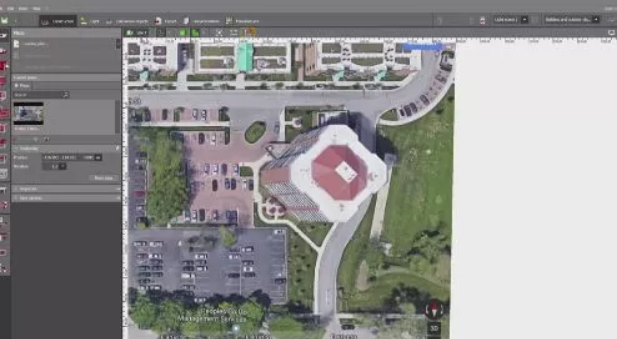
Draw a new building:
Let’s take a look at the design, you can make the JPG transparent so that the building will be more prominent.
There are also two small adjustments, one for the North Arrow, which can be activated at the bottom right of any view:
Both planar and 3D views can be rendered:
You can also set the coordinate system of the floor, for example, based on this axis, or for different single rooms, your screen layout will be adjusted to make your direction and report presentation easier.
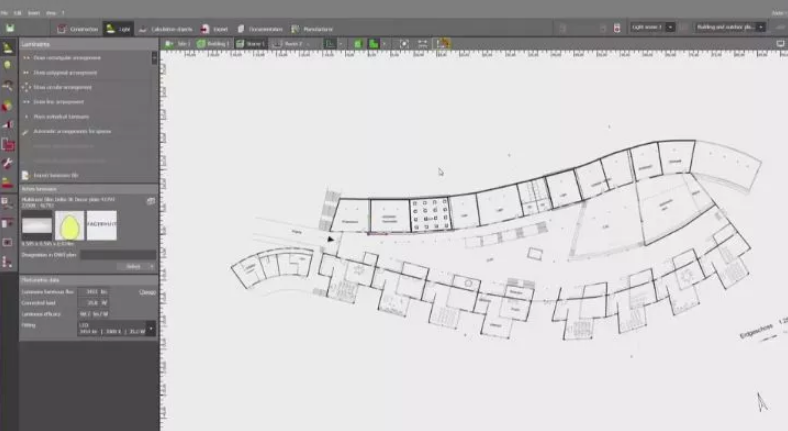
Another small feature is for fixtures:
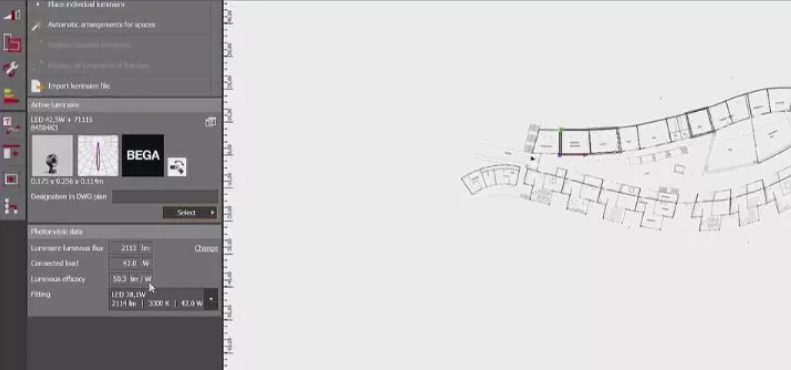
You can see here that we automatically calculate the luminous efficiency of each luminaire:
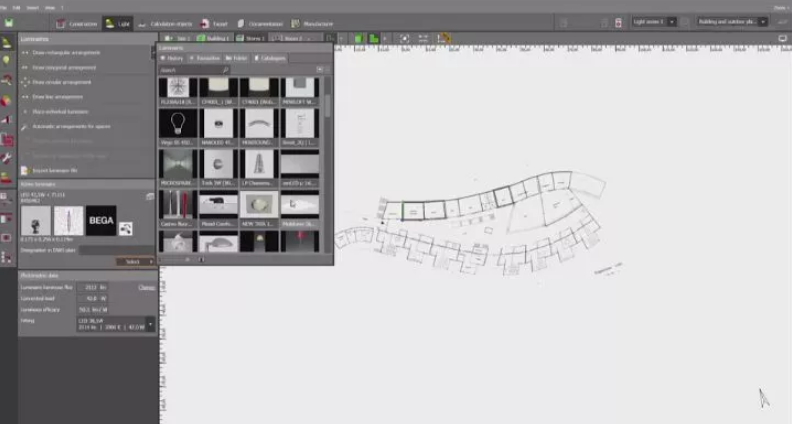
Like this example we get nearly 100 lumens per watt to illuminate this space:
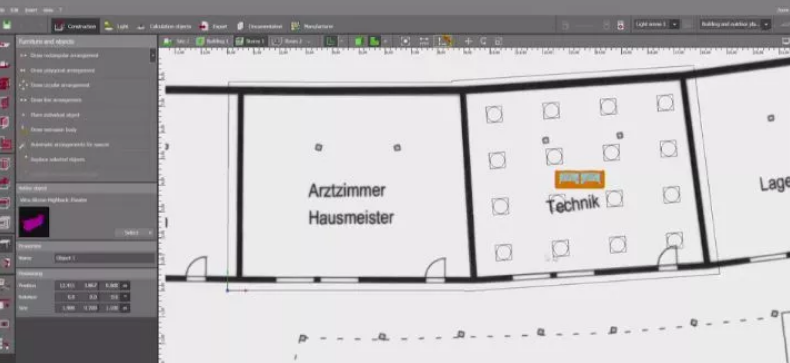
There is also a small feature that can help with your daily work:
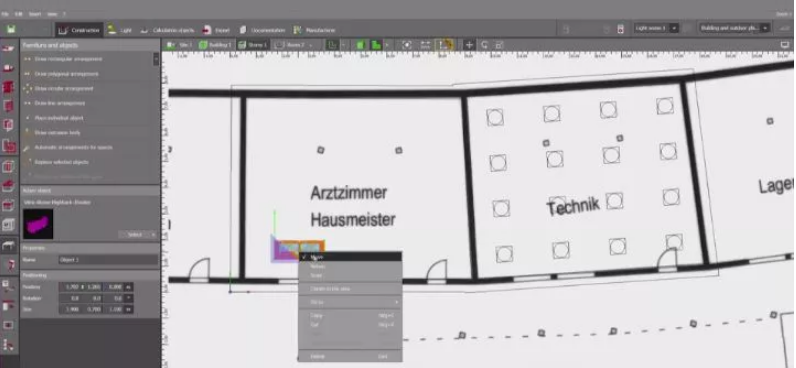
Just put each object in the space. For example: put the way the sofa is dragged into space, click the right mouse button to select the space in the space, you can choose to use it or center it in another space.
Above, I hope that these new features, big or small, will make your daily work easier so that you will find it more interesting and fulfilling when you use the software.